The History of Photography
|
A convex mirror is a spherical reflecting surface (or any reflecting surface fashioned into a portion of a sphere) in which its bulging side faces the source of light. Automobile enthusiasts often call it a fish eye mirror while other physics texts refer to it as a diverging mirror. Within the renaissance (16th Century) artists became more and more interested in exploring and representing the reality of nature. Leonardo Da Vinci was a famous face for very anatomical drawings and took at great interest in contemporary advances in science.
|
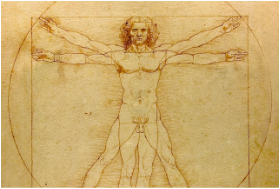
Vitruvian Man - Leonardo Da Vinci
|
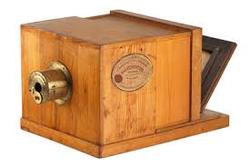 The Daguerreotype
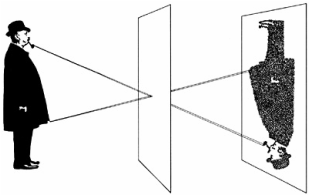
In order to create such realism, artists developed such instruments to assist them in their quest for the perfect perspective. One such instrument was the camera obscura, a dark room/space in which an inverted image was projected onto a surface. As technology developed smaller more controllable apparatuses were developed such as the camera lucinda which were used as portable optical devices.
As the industrial revolution transformed society in the 1800's with mass-production leading the way forward scientists endeavoured to reproduce reality in a fixed format. In 1827, the scientist Joseph Niepce was successful in fixing the first project image of his view from his window in Le Gras, South of France. Louis Jacques Daguerre worked with Niepce in his quest to fix the first projected image. Daguerre was a painter on stage sets and illusionistic scenery for the Diorama a popular visual entertainment in Paris. In January 1893, Daguerre officially announced the invention of the Daguerreotype, a type of photography which was laterally reversed and monochromatic printed onto a metal plate.
Around the same time as the invention of the Daguerreotype, an English scientist called William Henry Fox Talbot developed another type of photography called the called the Calotype. The Calotype had one distinct advantage over the Daguerrotype: it could be reproduced as a negative as opposed to being single, non duplicatable image. In terms of mass production, Talbots Calotype was far superior. However it lacked the sharpness and overall quality to a Daguerreotype and this made it less popular in the early years, especially since many European countries and American had adopted Daguerre's process. However the Calotype was improved over time and advances in paper technology led to better processing. Thus, the Calotype soon became the most popular type of photography that is still used today. Talbots initial photographic experiments involved producing photograms or what he referred to as 'Photogenic drawings'.
Photograms
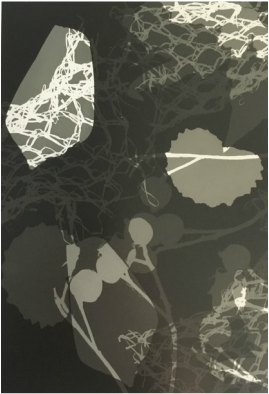
To create a photogram you place many different objects that include interesting shapes and that are made from different objects onto photographic paper and expose it to light for around 3 seconds. Then you place the photographic paper into 3 chemicals that allow the image you have created by blocking light to expose, then water to remove the chemicals so that it can then be placed into the dryer. The objects on the paper will come out white or a lighter grey depending how transparent they are and parts of the paper completely exposed to light will turn black.
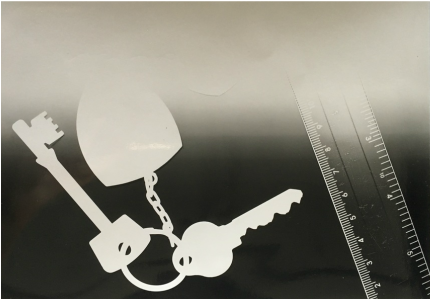
The first photograms I created are called test strips, these allowed me to see how many seconds of exposure was perfect for the photographic paper. I did this by placing objects onto the paper as stated above and then covering parts of the paper, exposing the top part of the paper to less light and the lower part of the paper to more light. Creating a gradient. This allowed me to decide the perfect amount of exposure for the other photograms. I decided that 4 seconds was perfected as i like the contrast between a black background and a white block image.
|
|
|
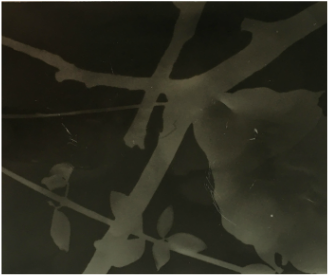
The first image is of plants simply placed onto the photographic paper, the silhouettes of the plants are slightly grey as they had been exposed to to much light and therefore there is no stark contrast between the image and the background. The second image was created via a technique of exposing the paper to light many different times yet in between shots moving the objects allowing a layered image of the different objects on top of one another. The final image was created much like the first image until it came to developing the photograms. Instead of placing the photographic paper into the developer, I used a paint brush to only place it onto certain area's this meant that some of the paper remained white and other areas had small intricate details, additionally the objects where less visible and looked more like a pattern. Finally there was not as much of a bold contrast between the background and images.
The Pinhole Camera
The Pinhole camera is a camera that prints images by the amount of light exposed to the photographic paper. To create an image, you place a piece of photographic paper into the pinhole camera in a dark room so the paper is not exposed to light and does not over expose. Then the paper is completely blocked from any light. To created an image you go to an area that you would like to capture and rest it on a flat and steady object, so that the image exposed to the paper is only that image. To expose the camera to light you peel back the blacked out cover that blocks out the small whole that allows light into the box or camera. You give the photographic paper around 3 seconds to be exposed to light and then cover the blacked out cover to make sure the paper is not over exposed. To develop the photograph from the pinhole camera, you do the same process as photograms.
You can also created pinhole camera very easily. It can even be made out of a Pringles container. To do this you; cover the Pringles container in black masking tape to block out light,then cut a small square in can, once this is done you use tin foil to cover the square than you have just cut out and then cover that in black masking tape. Next you pierce a small whole into the tin foil and tape with a pin, this will be the lens of the camera. This creates a pinhole camera.
You can also created pinhole camera very easily. It can even be made out of a Pringles container. To do this you; cover the Pringles container in black masking tape to block out light,then cut a small square in can, once this is done you use tin foil to cover the square than you have just cut out and then cover that in black masking tape. Next you pierce a small whole into the tin foil and tape with a pin, this will be the lens of the camera. This creates a pinhole camera.
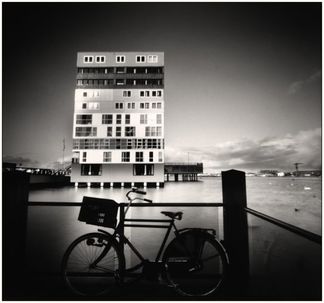
Patrick Caloz
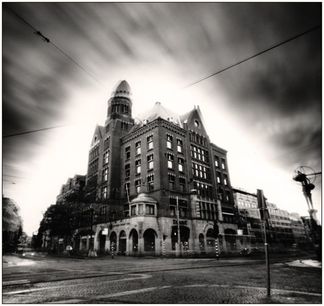
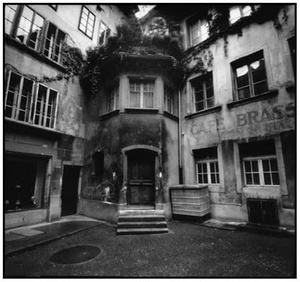
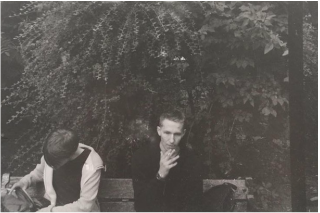
Patrick Caloz is a photographer whom, takes photographs such as the images below with a film camera, I used his images as inspiration for the photographs I took in my local area, (Muswell Hill). I think that the images he took are effective as they have a central focus, yet there is also other objects and scenery within the photographs specific points are bolder because of the use of light in this photographs as the black backgrounds reminded me of a boarder. .
|
|
|
Shooting with film

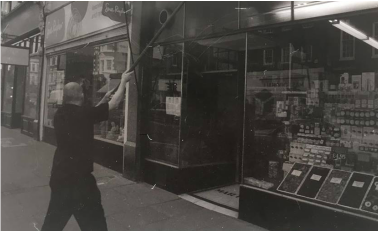
One task was to go around Muswell Hill Broadway and take photographs. I decided to take photographs of people, as it has unlimited interpretations to different people, depending on your social background. The film inside the camera was black and white, this created more of a focus on the people instead of the background as nothing was distracting from the focus point of the image. With the SLR camera I could take 24 photographs. Once I had taken images I thought were effective, I took the film out of the camera in the dark so the images were not exposed to light, and i placed them into a black container and added the developer for 6 minutes the stopper chemical for 2 minutes and the fixer chemical for another 6 minutes. Once this was done i placed water into the container to rinse of any excess chemicals. Finally I placed the film into a drier overnight so the film was ready to be created into a larger photograph.
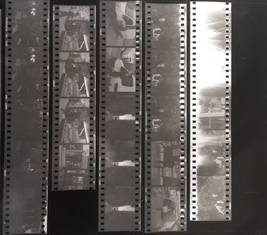
The first time I exposed my film to photographic paper I used a test strip to see how many seconds I should expose the film for to get the perfect amount of light so the photograph was not under nor over exposed. I did this by placing one strip of film on top of the photographic paper, placing a glass sheet over the top of this and moving black card 2 cm back after shining 1 second of light onto each part of the paper. This allowed me to see that 4 seconds was the perfect amount of light for my pictures, as shown by the test strip on the right.
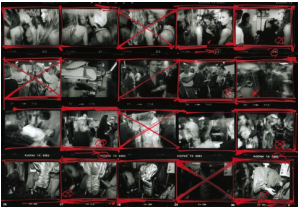
Once I had decided the perfect amount of exposure for the film I created a contact sheet, this is a sheet of paper that allows you to see all of the photographs that you have taken on your film without printing out all of the images separately and on a large scale. This is useful because with a film camera it is not possible to view the pictures you have taken digitally, and therefore you use the contact sheet and a magnifying glass to see your best photograph and choose that image to enlarge and print. To create a contact sheet, you place all of your film into a plastic wallet. This lines up all of your images. Once this is done you place a large piece of photographic paper underneath your film, then you expose the paper to the perfect amount of light that you have previously decided. Mine was 4 seconds. This creates the first image below.
The first time I exposed my film to photographic paper I used a test strip to see how many seconds I should expose the film for to get the perfect amount of light so the photograph was not under nor over exposed. I did this by placing one strip of film on top of the photographic paper, placing a glass sheet over the top of this and moving black card 2 cm back after shining 1 second of light onto each part of the paper. This allowed me to see that 4 seconds was the perfect amount of light for my pictures, as shown by the test strip on the right.
Once I had decided the perfect amount of exposure for the film I created a contact sheet, this is a sheet of paper that allows you to see all of the photographs that you have taken on your film without printing out all of the images separately and on a large scale. This is useful because with a film camera it is not possible to view the pictures you have taken digitally, and therefore you use the contact sheet and a magnifying glass to see your best photograph and choose that image to enlarge and print. To create a contact sheet, you place all of your film into a plastic wallet. This lines up all of your images. Once this is done you place a large piece of photographic paper underneath your film, then you expose the paper to the perfect amount of light that you have previously decided. Mine was 4 seconds. This creates the first image below.
|
|
|
After creating a contact sheet I used a magnifying glass to see what photographs came out best. Once I had decided on my favourite photo's and the photographs that came out best out of the 24 I had taken I placed the film into the enlarger. This zooms the small image taken from the film and enlarges it onto the photographic paper. Once the image is displayed the next thing to do is to make sure the image is in focus, this is done by enlarging or shrinking the image the fit the paper and additionally changing the aperture. Once the image is perfectly in focus you expose the photographic paper to light, this prints the image onto the paper. I exposed the paper for 4 seconds a this was the perfect amount of light for the film previously. This method produced the middle and right images above.
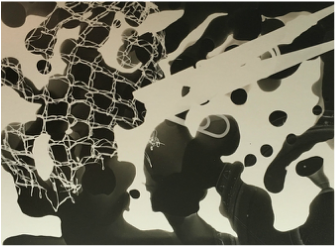
William Klein
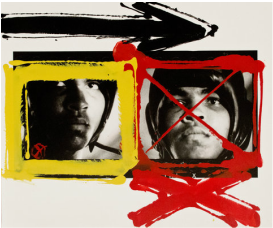
William Klein is an American-born French photographer known for his ironic approach to his extensive use of unusual photographic techniques in the context of photojournalism and fashion photography. He saw contact sheets in a more creative manor, he saw them as art in them selves. Because of this he created a series called 'Painted contact sheets' as seen in the images below. Where he painted onto of all of the photographs that were in his film contact sheet.
|
|
|
The SLR -Single Lens Reflex
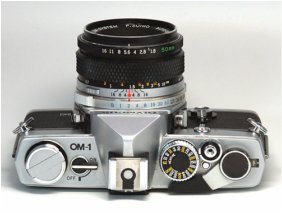
The single lens reflex camera is made up of a mirror and prism system which enables the photographer to view the portrait and landscape through the lens. This can then be captured when the photographer is pleased with the photograph and want to capture a particular moment in time.
Within a SLR camera you can shoot with black and white, or coloured film. You can change the aperture this controls the amount of light entering the camera through the lens. With a larger aperture or opening, more light passes through to the image sensor; with a smaller aperture, less light passes through. With a wide aperture a larger depth of field is when focused on a subject far away. You can also change the shutter speed, the faster the shutter the speed the shorter the image you are taking a photograph of is exposed to light, and the shorter the shutter speed the longer the photograph will be exposed to light. Short shutter speeds combined with movement of the camera can create a blur of the moving objects. A fast shutter speed will create a more focused photograph.
Within a SLR camera you can shoot with black and white, or coloured film. You can change the aperture this controls the amount of light entering the camera through the lens. With a larger aperture or opening, more light passes through to the image sensor; with a smaller aperture, less light passes through. With a wide aperture a larger depth of field is when focused on a subject far away. You can also change the shutter speed, the faster the shutter the speed the shorter the image you are taking a photograph of is exposed to light, and the shorter the shutter speed the longer the photograph will be exposed to light. Short shutter speeds combined with movement of the camera can create a blur of the moving objects. A fast shutter speed will create a more focused photograph.
